How to Effectively Manage Your Clients as a Freelancer with Freelance Central
December 25, 2025

Managing clients is a core part of freelancing. As your workload increases, WhatsApp chats, email threads, verbal agreements, and scattered notes can quickly turn into confusion.
To run your freelance work professionally, you need a single place to store client details, track agreements, issue invoices, and keep everything organized.
That’s where Client Central comes in. It’s a dedicated client management feature inside Freelance Central that lets you efficiently manage your clients. It allows you to create new client records, view existing ones, separate them by type (individual or corporate), and access their information when creating service agreements or invoices.
Why Client Management is Essential as a Freelancer
When you are a freelancer, you are responsible for every part of the client relationship. There is no support team tracking names, agreements, deadlines, or invoices on your behalf.
Without a clear way to organize and store client information, it becomes very easy to lose control of work as more clients are added.
What goes wrong without proper client management:
- Client details sit in different places such as WhatsApp, email, and notes
- You forget what was agreed or the rate that was discussed
- Invoices are delayed because you cannot find the information you need
- You lose track of who has paid and who still owes payment
- Expectations become unclear, leading to misunderstandings
What proper client management helps you do:
- Store client details in one place so you always know where to find them
- Refer back to agreement terms without searching through messages
- Create and send invoices faster because the information is already saved
- Stay organized when you are working with multiple clients at the same time
Managing one or two clients might feel manageable. Once you are working with five or more, the risk of forgetting details or delaying payments increases. A structured way to manage clients protects your time, helps you stay professional, and keeps your freelance work organized.
What Client Central Is Designed to Do
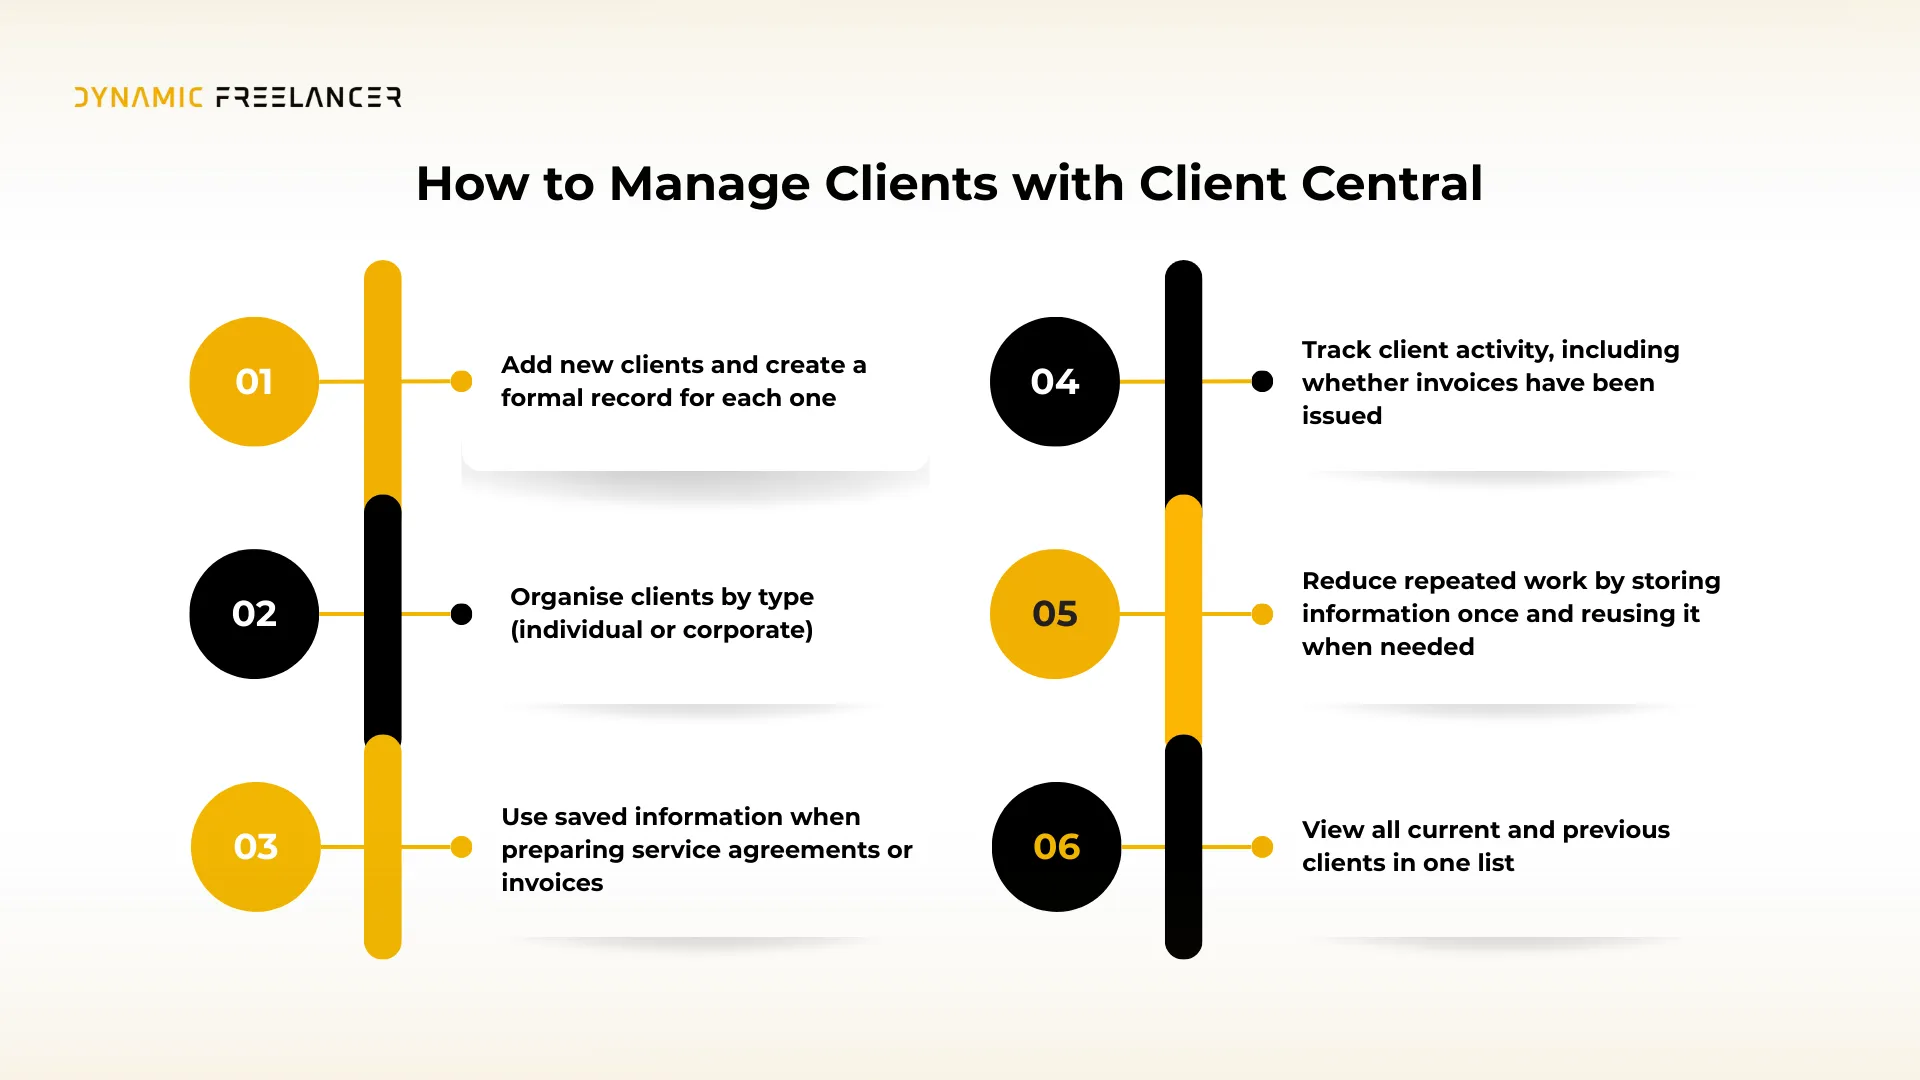
Client Central gives you a single place to manage all client-related actions. It allows you to:
- Add new clients and create a formal record for each one
- Organise clients by type (individual or corporate)
- View all current and previous clients in one list
- Open a client record to quickly check names, details, and terms
- Use saved information when preparing service agreements or invoices
- Track client activity, including whether invoices have been issued
- Reduce repeated work by storing information once and reusing it when needed
 How to Access Client Central
After logging into your Freelance Central dashboard, use the left-hand menu and select Clients. This opens Client Central, where all existing clients are listed and where new clients are added.
From here, every client-related action starts.
.webp)
Understand the Client Central Dashboard Features
When Client Central loads, you will see several fixed elements on the screen. Each one has a specific purpose.
Key Features of Client Central
Client Central brings all client-related actions into one place so you can manage work without switching between tools or searching through messages. Its key features include:
- Add New Client tab: Create a client record that will be used for agreements, billing, and tracking.
- Individual and Corporate Tabs: Organize clients by type to avoid mixing personal clients with business entities.
- Client List View: See all added clients at a glance, including their name, contact details, and whether they have invoices issued.
- Client Search Bar: Find any client instantly by typing their name instead of scrolling through a list.
- Service Agreement Template: A ready-made agreement template is available for use. You can download a copy, edit the terms to suit your work, and send it to the client.
.webp)
Client Type Tabs: Individual vs Corporate
Client Central separates clients into two categories:
Individual Clients
Used when you are working directly with a person rather than a registered company.
Corporate Clients
Used for businesses, agencies, or organizations. This separation is intentional. It ensures:
- correct client records
- cleaner invoicing
- clearer agreements
As your freelance work grows, this distinction prevents confusion and keeps your records professional.
How to Add a Client in Freelance Central
Adding a client is a straightforward process and only takes a few steps.
Step 1: Click “Add New Client”
At the top right of the screen, click Add New Client. This opens a form where you will enter client information.
Step 2: Select the Client Type
Choose whether the client is:
- Individual
- Corporate
This selection determines how the client is categorized in your records.
Step 3: Fill in Client Information
- Client name
- Email address
- Phone number
- Location
- Company name (for corporate clients)
This information is important because it will help in populating invoices and agreements later.
Conclusion
Client management is a key part of freelancing. As your client list grows, relying on chats, notes and memory becomes risky and unprofessional.
Client Central gives you one organized place to store client information, track activity, prepare agreements and issue invoices. It removes confusion and helps you manage your work like a business.
What to Do Next
If you already have access to Freelance Central, open Client Central in your dashboard and add your first client.
If you are not yet using Freelance Central, sign up as a freelancer with us to access Client Central for free and begin managing your clients in a structured and professional way.
Disclaimer: This article is intended to provide practical, up-to-date information. Details may vary based on individual circumstances, location, or changes in regulations. The information provided is for informational and educational purposes only.